Designing wall mounts for the Odroid HC2
by Andrew Kroh
When I purchased Hard Kernel's Odroid HC2, I assumed I would find a tidy way to mount the device along side my other computer and network gear. I considered building a mount or shelf from wood; I also considered drilling holes in the heatsink to hang the device from a screw-in hook, but none of these solutions were low profile or sleek. This led me down the path of designing and printing my first 3D part.
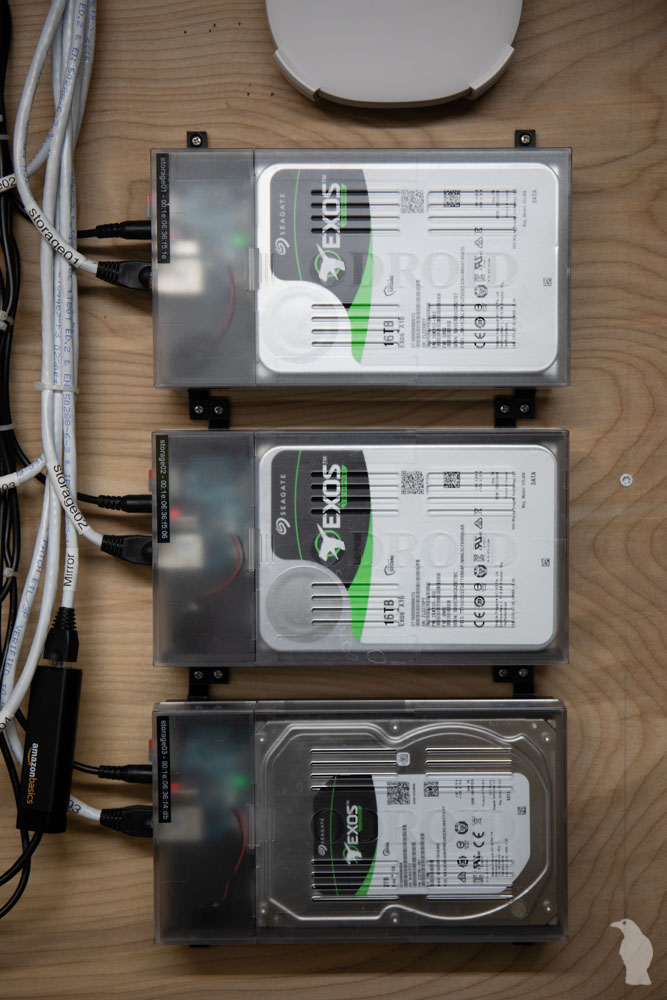
The Odroid HC2 is a small computer attached to a heatsink that accepts a single 3.5" hard disk. It's a low cost (~$50), low power (~10W) way to attach storage to your network. I am using three of them together to provide redundancy.
I'd never used a CAD program nor did I have access to a 3D printer when I decided I wanted to make my own mount. And thanks to the pandemic of 2020, the "maker space" at the public library was closed, so I couldn't try 3D printing before investing in my own equipment.
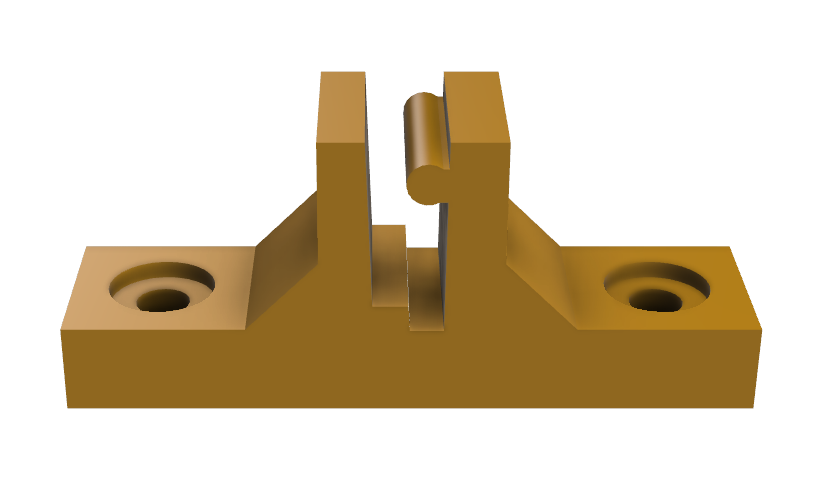
Before purchasing a printer, I wanted to be sure I could learn to use a CAD program. I watched a few YouTube tutorials on the subject and then gave design a try with Autodesk Fusion 360. Below is the haphazardly designed first attempt. It was enough to convince me that with more time I could produce a better design. So I ordered a Prusa Mini printer.
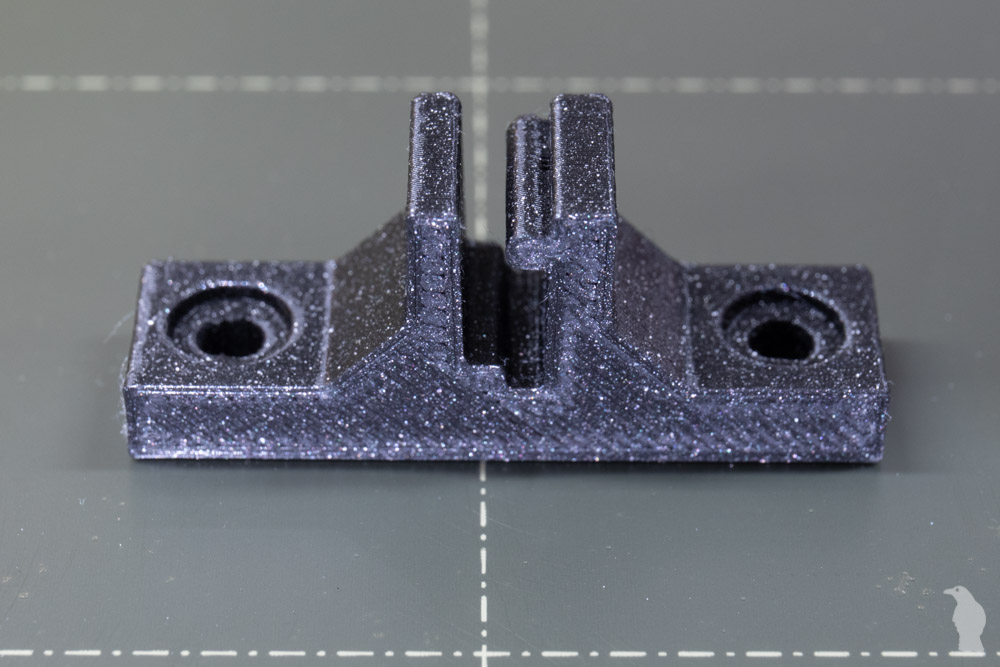
The printer kit arrived in December after an 8 week lead time. I dusted off the earlier design and prepared it for printing. I exported the 3D design to an STL file and ran that through Prusa Slicer to create a g-code file (the raw instructions to the printer for creating the part). I loaded the g-code file to a USB stick and commenced printing with PLA filament. It was rewarding to have something I designed come to reality in just 25 minutes (even if it's an ugly mess).
While this first prototype did actually fit the HC2's heatsink, it had several problems. It wasn't symmetrical, so two different parts would be needed for the the top and bottom. There wasn't enough clearance for screw heads. And the fit around the HC2 was too tight.
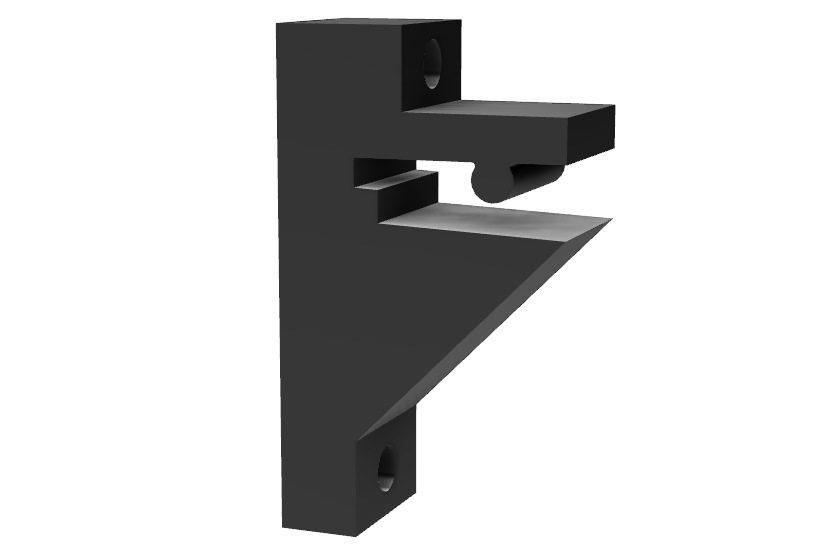
I designed a second version in about 4 hours (I had to relearn all the things I had forgotten after the 8 week wait). I took into account the things I learned from the first version.

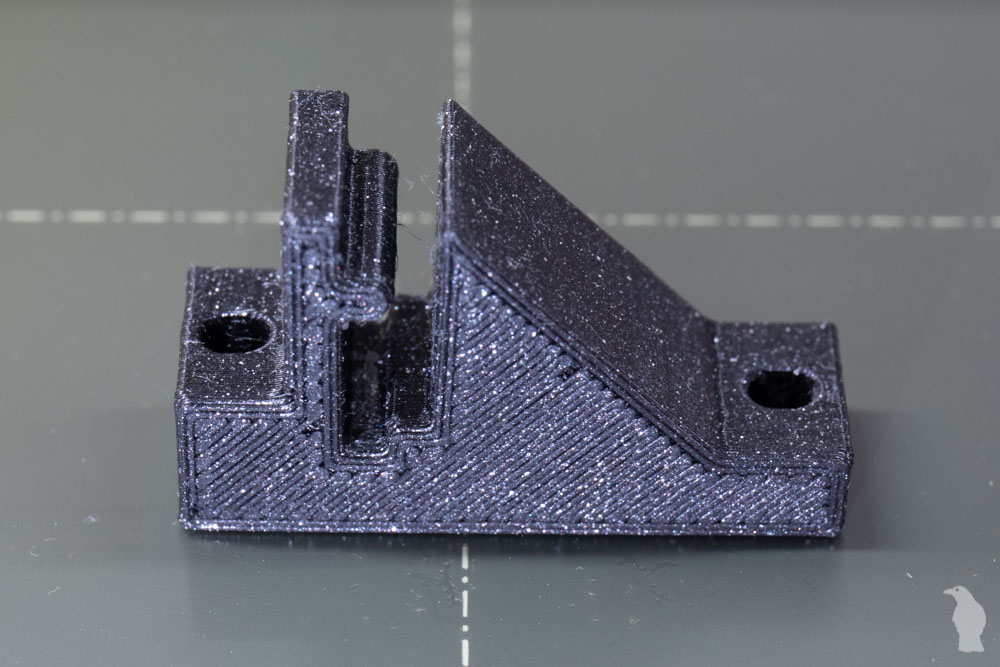
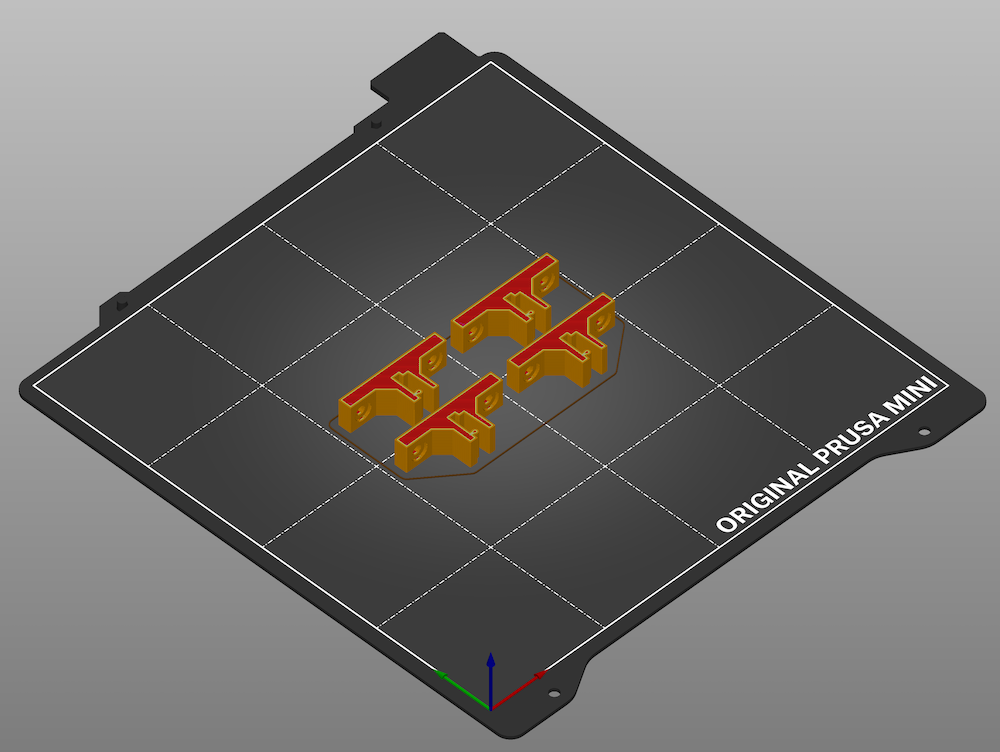
The second version fit perfectly. So I loaded the ASA filament and began batch printing the production parts. ASA filament was used because of its high heat tolerance. The heatsink temperature is routinely 43°C so PLA filament would have likely deformed over time.
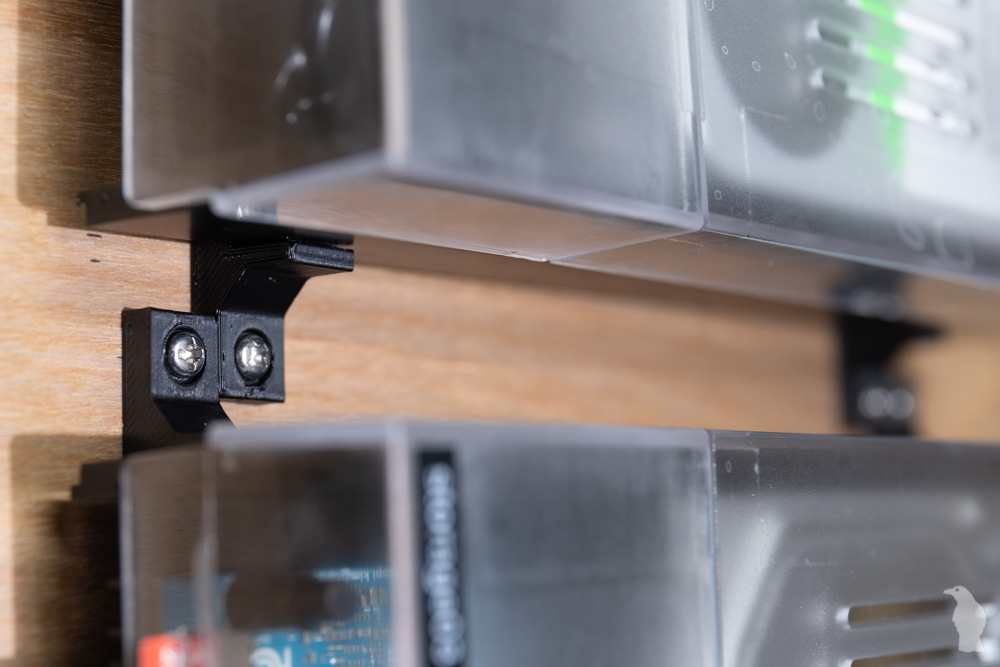
And finally after many months of sitting on my workbench, each Odroid HC2 is wall-mounted using four M3 screws.
This project reaffirmed my opinion that the Metric system is far superior to the Imperial system. And I learned that Vernier calipers and a good metal ruler are really useful tools to have around.
The project files can be downloaded from github.com/andrewkroh/3d-designs.
Subscribe via RSS